Application Instructions (Dry Method)
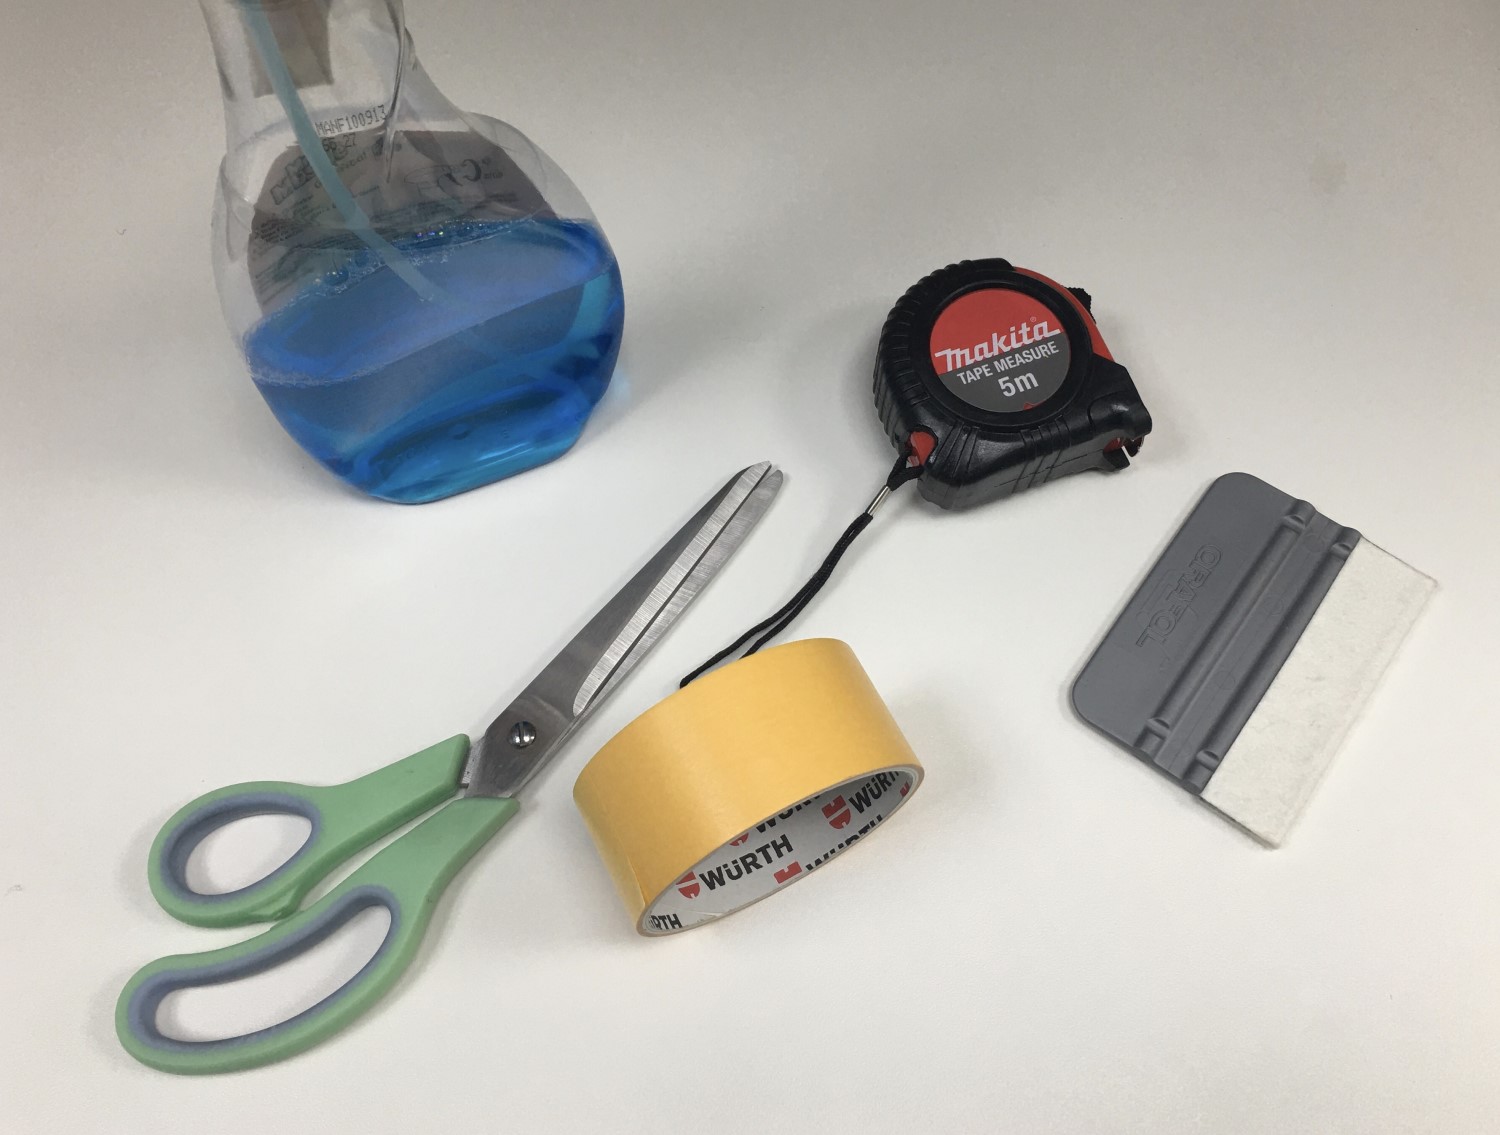
Tools
Gather everything before you start: scissors or craft knife, measuring tape/ruler, application squeegee (or plastic card), masking tape, and a cleaner to degrease the surface (isopropyl alcohol + lint‑free cloth). Optional for large decals: spray bottle with mild soapy water (wet method), heat gun/hair dryer for curves, and a pin/needle to pop any trapped bubbles. Firmly rub over the transfer tape with the squeegee first to ensure strong adhesion between the tape and the vinyl lettering.
Tip for SEO: these tools work for window stickers, wall decals, vehicle graphics and boat lettering installed with transfer tape.
Position
Thoroughly clean and degrease the surface (avoid silicone glass cleaners). Decide on the exact position of the vinyl lettering. Always measure from the letters themselves, not from the surrounding paper. Use a level or make light pencil marks/tape guides so the text sits perfectly straight.
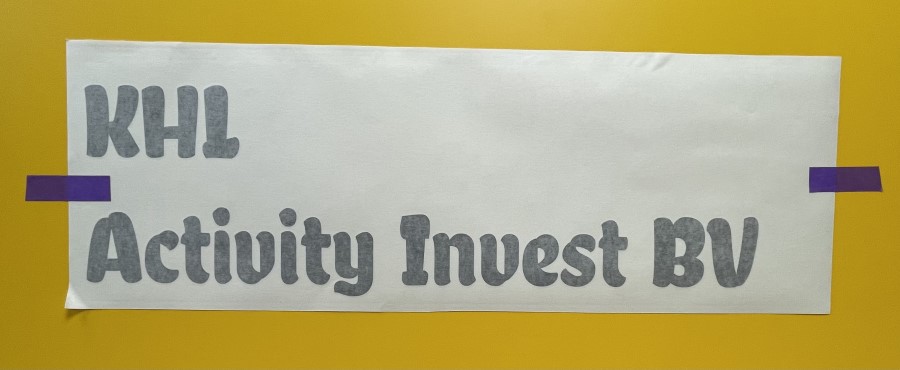
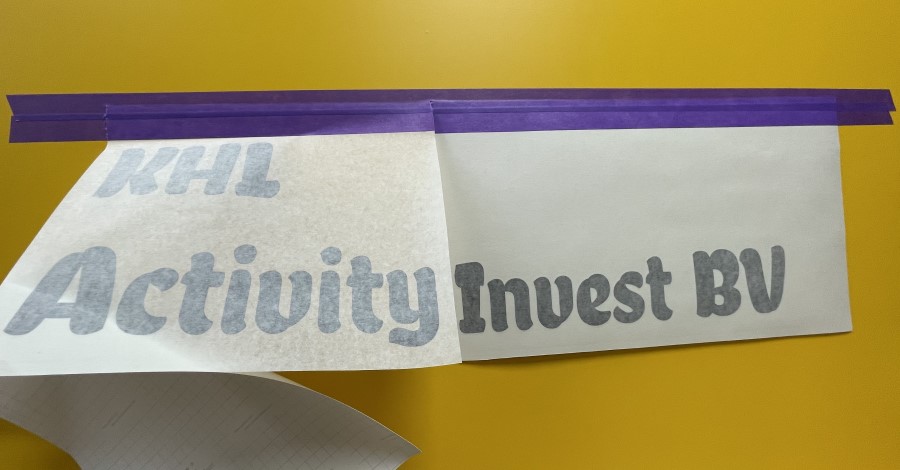
Create a hinge: fix the entire graphic in place with masking tape along one edge and double‑check measurements on the opposite side. When everything is level, tape that side too to lock the position.
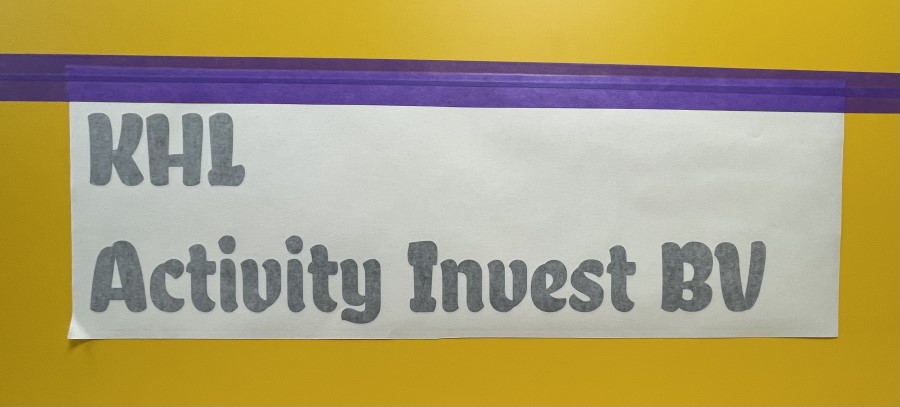
Tape
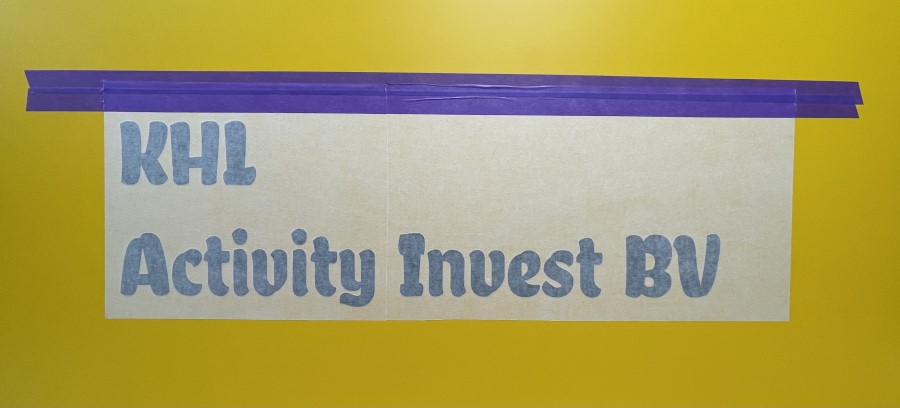
Apply a continuous strip of masking tape along the entire top edge (or centre for a middle hinge), as shown in the photo. This hinge keeps the layout aligned while you remove the backing paper. Now remove the small side tapes—the hinge will hold the graphic in place.
This “hinge method” is the most reliable way to apply window lettering, vehicle decals and wall quotes straight and bubble‑free.
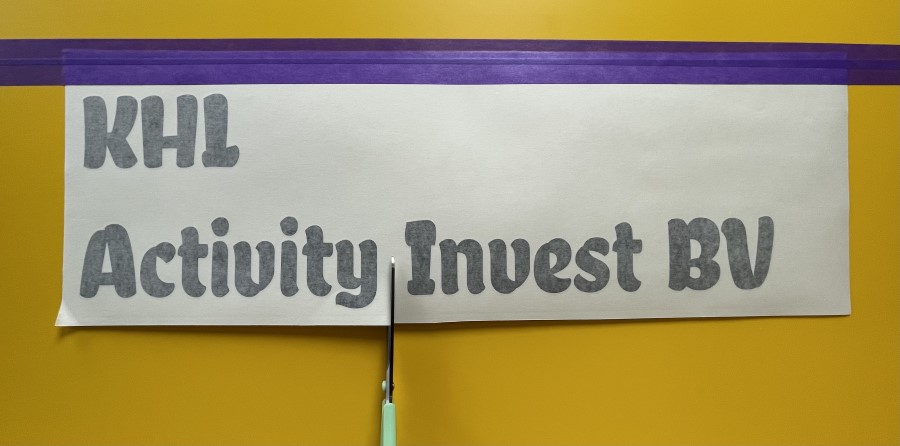
Sectioning (optional)
For extra‑long graphics, make relief cuts to divide the decal into smaller sections. This makes handling and installation much easier, especially on shop windows, vans and boat hulls. Be careful to cut only the paper backing—do not cut through the vinyl letters.
Apply
Fold the graphic up on the hinge and peel away the backing paper from the exposed section. Let the decal fall back into place and squeegee firmly from top to bottom and from the centre outward at a 45° angle. Use overlapping strokes and steady pressure.
For very large decals on glass, the wet method can help: mist the surface lightly with water + a drop of dish soap, position, then squeegee the fluid out. Ideal application temperature is above +8°C.
Finish the other side
Repeat the steps for the remaining section. Work slowly, applying firm, even pressure—especially over thin strokes and corners. Once complete, go over the entire decal again with the squeegee. Remove the masking‑tape hinge.
Allow the adhesive to build strength over the next 24 hours; avoid heavy cleaning or high‑pressure washing during this time.
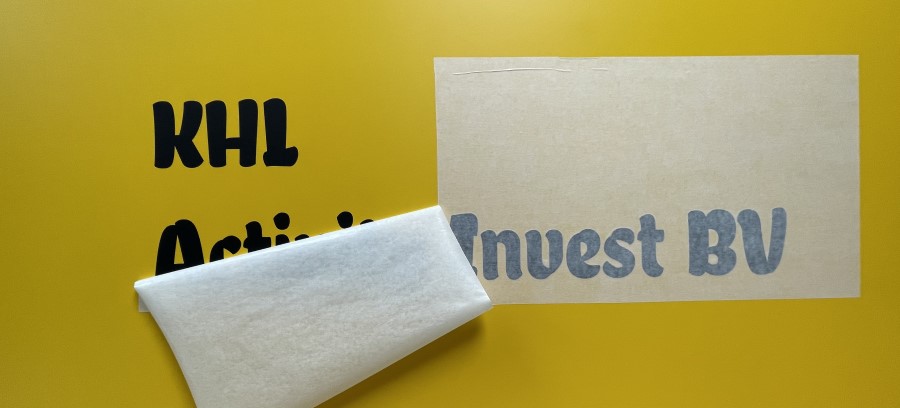
Remove the transfer tape
Start at the top‑left corner and peel the transfer tape back on itself at a very low angle, keeping it close to the surface. Pull slowly and steadily until all tape is removed. If any letter lifts, press it back down and squeegee again; a little warmth can help adhesion on cold days.

All done!
The result is clean, professional vinyl lettering with no background—only the letters remain on the surface. Suitable for shop windows, office glass, vehicles, boats and interior walls. For best results, wait 48 hours before washing; for boats, avoid submerging or high‑speed spray for 48 hours so the adhesive can fully cure.